Product Identification Guide
How to Read NISSIN's Model Number
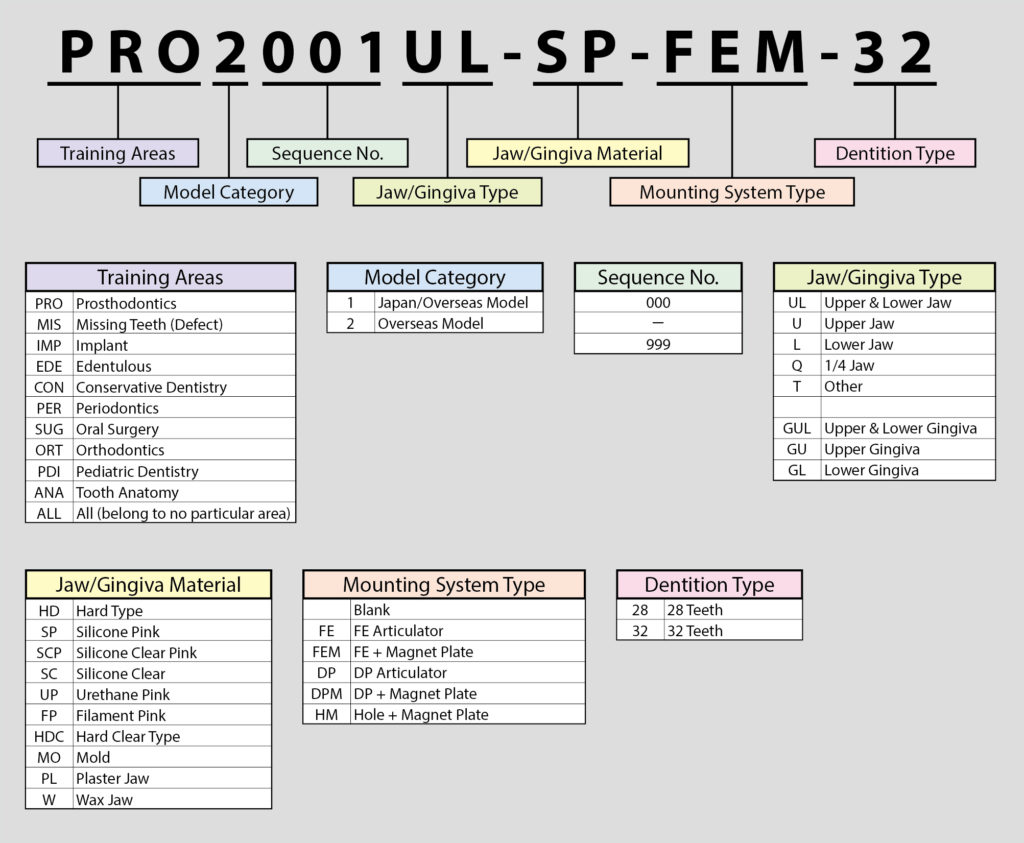
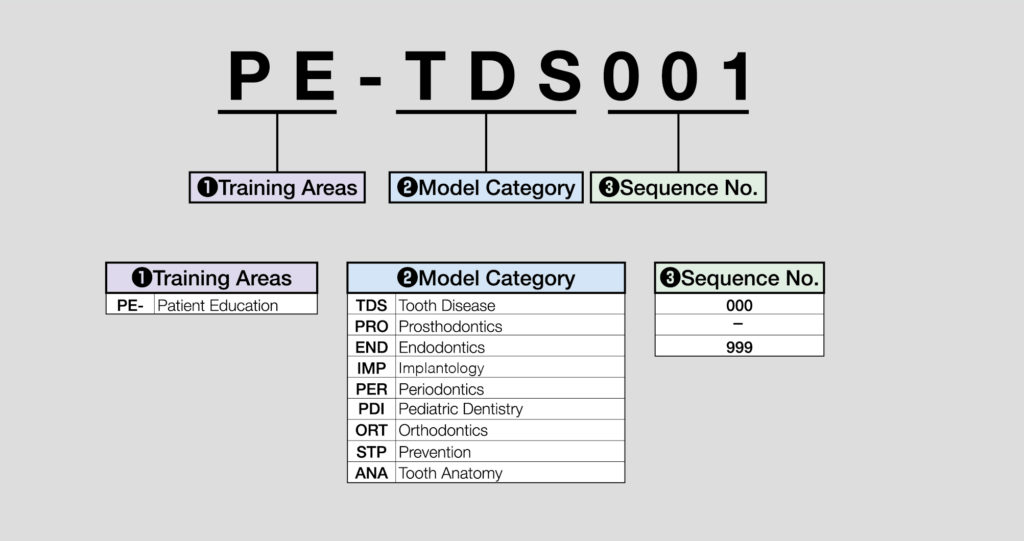
The product model number is composed of segments indicating its specific features. Refer to the table below for details on each segment.
Dental Training Products
Patient Education Models
Dental Notation System
Our models follow the FDI World Dental Federation notation. Each tooth is identified by a two-digit number.
Permanent Teeth (Adult Teeth)
| Upper Right | Upper Left | ||||||||||||||||
| ADA | 1 | 2 | 3 | 4 | 5 | 6 | 7 | 8 | 9 | 10 | 11 | 12 | 13 | 14 | 15 | 16 | ADA |
| FDI | 18 | 17 | 16 | 15 | 14 | 13 | 12 | 11 | 21 | 22 | 23 | 24 | 25 | 26 | 27 | 28 | FDI |
| FDI | 48 | 47 | 46 | 45 | 44 | 43 | 42 | 41 | 31 | 32 | 33 | 34 | 35 | 36 | 37 | 38 | FDI |
| ADA | 32 | 31 | 30 | 29 | 28 | 27 | 26 | 25 | 24 | 23 | 22 | 21 | 20 | 19 | 18 | 17 | ADA |
| Lower Right | Lower Left | ||||||||||||||||
Primary Teeth (Baby Teeth)
| Upper Right | Upper Left | ||||||||||
| ADA | A | B | C | D | E | F | G | H | I | J | ADA |
| FDI | 55 | 54 | 53 | 52 | 51 | 61 | 62 | 63 | 64 | 65 | FDI |
| FDI | 85 | 84 | 83 | 82 | 81 | 71 | 72 | 73 | 74 | 75 | FDI |
| ADA | T | S | R | Q | P | O | N | M | L | K | ADA |
| Lower Right | Lower Left | ||||||||||
*Tooth numbers in our website are indicated by the FDI (World Dental Federation) dental notation system.
Explanation of NISSIN models and articulators
Articulator Variations
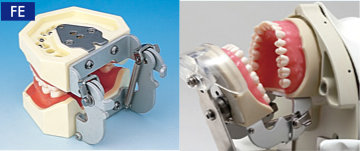
FE articulator
This articulator can be opened and fixed at any position including the maximum opening position, and allows a variety of occlusal movements.
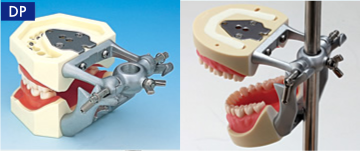
DP articulator
This articulator is used when practicing with the pole mount. Its functions are the same as the D articulator. The DP articulator is also compatible with most pole mount type phantoms offered by other manufacturers (note: articulator may not fit on some phantom systems).
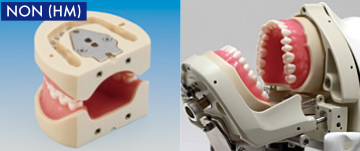
Without articulator (HM)
Models without an articulator can be attached to phantom and manikin systems with adjustable occlusion function capability. The holes in the back also allow easy attachment to FE, D, and DP type articulators if desired.
Technical Information
How to Remove and Attach the Tooth Model
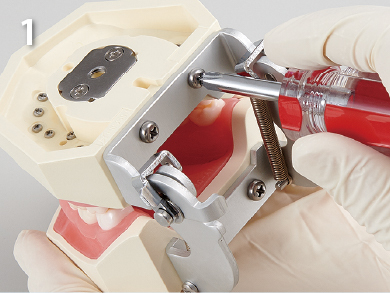
Removing the Tooth Model

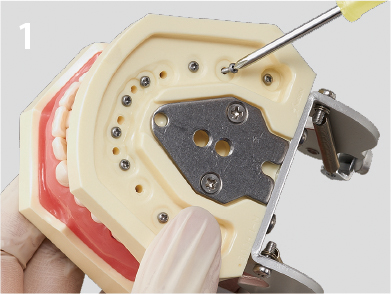
Step 1: Unscrew the fixing screw on the underside of the jaw model using the supplied screwdriver.
Step 2: Remove the tooth model.
Point
Be sure to check that the fixing screw is not left inside the tooth model, and then remove. If forcefully pulled out, the screw hole may be damaged and the tooth model may not reattach.
Attaching the Tooth Model
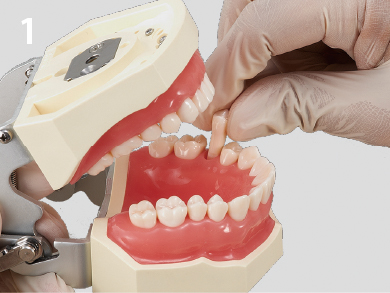
Step 1: Insert the tooth model in the proper position.

Step 2: Using the supplied screwdriver, lightly screw in the fixing screw from the underside of the jaw model.
Point
Do not tighten the screw at this point.

Step 3: After all the tooth models are lightly screwed in, close the articulator. Tighten the fixing screws when it is properly occluding.
Point
If the screws are tightened too much, the threads in the screw holes may be damaged. If this happens, the screw will not tighten and cannot be reattached. Tighten just enough so that the tooth models do not move.
Attaching and Removing the Articulator
How to remove the Articulator
Step 1: Use the supplied screwdriver and unscrew the 4 articulator screws.
Point
When removing the articulator, depending on the type, the articulator may snap back due to the force of the spring. Please be careful not to have your fingers caught in between.
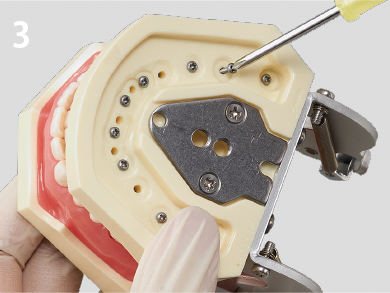
How to attach the Articulator

Step 1: Lightly tighten the 2 screws on the Upper jaw.
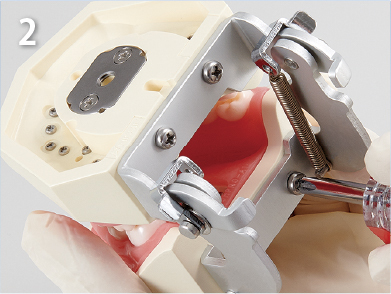
Step 2: Likewise, lightly tighten the Lower jaw.
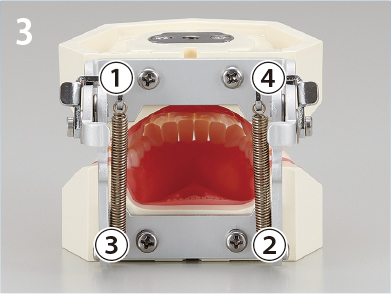
Step 3: When the model is occluding, tighten the screws in the order shown in the picture.
*The jaw model has to have screw holes in order to be able to attach an articulator to it.
If you have a model that does not have screw holes and wish use it with an articulator, please contact us.
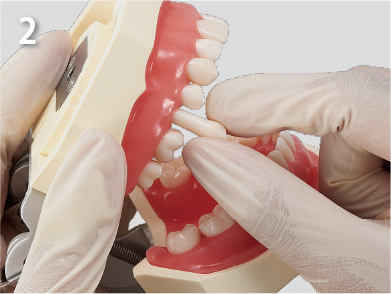
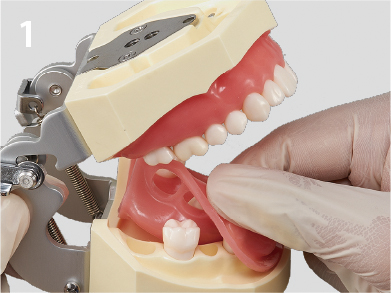
Attaching and Removing the Gingiva
How to remove the gingiva
Step 1: Remove every other tooth model.
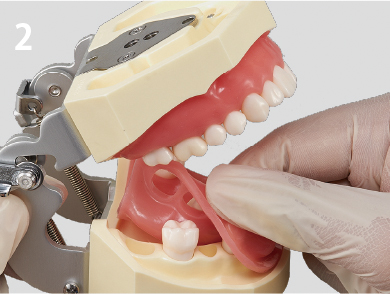
Step 2: Carefully remove the gingiva.
Point
The gingiva tear or stretch if pulled strongly or hooked with a sharp object. Please handle with care.
How to remove the gingiva
Step 1: Fit the gingiva onto the model.
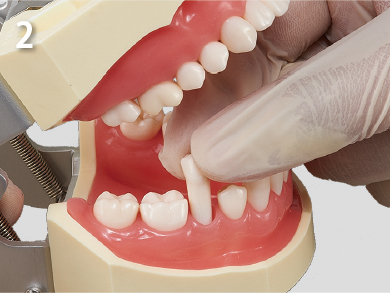
Step 2: Insert the tooth models.
Step 3: Fix the tooth models by tightening the fixing screw.